Most men know how to groom their facial hair. However, when it comes to cutting their own hair, men often find this daunting.
After all…
Many things can go wrong - your haircut might turn out patchy, or you might give yourself a bald spot.
On the other hand, regular visits to the barbershop can be pretty expensive. Sometimes, it's better to just do things yourself.
To solve this dilemma, we prepared a guide on how to cut your own hair for men. If you're bold enough to take this step, read on!
Page Contents
The Necessary Preparations
Before you start cutting your own hair, you must make some preparations so the whole process will be easier in the long run. Some of these preparations are:
1. Decide Your Haircut
The first step is to decide what haircut you want and how short you want it to be.
We recommend researching haircuts online or looking for old pictures when you just got a fresh haircut. This is incredibly helpful for beginners because it gives you a visual guide of how you want your hair to look.
Setting your objectives will help you stay on track, reducing the risk of reckless mistakes that will end up with you buzzing your entire head.
Then again, if you're a beginner, you must be prepared for the worst-case scenario. We recommend having a shorter "backup" haircut if your first choice doesn't go as planned.
If you're not ready for that, you're better off asking a family member for help or going to your local barbershop instead.
Knowing your needs will also help you find the appropriate tools to use.
For example, if you only want to clean up the sideburns and around your ears, you might only need a comb, mirror, and a beard trimmer or clipper. But if you're going for a more complex haircut, you may need other tools like hair thinning scissors.
2. Get The Right Tools
Hair Clippers
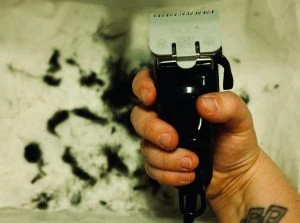
Hair clippers are a barber's best friend. Seriously - any barbershop you go to will have plenty of these.
A hair clipper has a motor attached to a piston holding the clipper blades. When you power it on, the motor moves quickly in a horizontal direction with a slightly vertical axis. This makes the blades rub against each other at a speed that can cut hair.
Good clippers will cut evenly and neatly regardless of hair texture and thickness.
Plus, they require little maintenance beyond brushing off the hair from the blades and lubricating it every other cut.
When buying a new clipper, we recommend looking for ones that come in a complete set. Using an unguarded clipper will end up with you having a shaved head. If you don't want that, you must use a guard, which we'll discuss next.
Clipper Guards
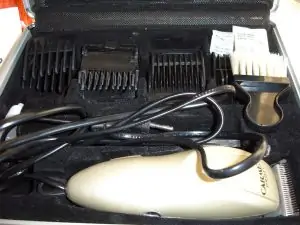
Clipper guards are teeth-like plastic accessories attached to hair clippers. As the name suggests, they "guard" the blades so they don't cut your hair shorter than your desired length.
Most guards are labeled from #1-#8, but some brand clippers have guards that reach #10 and #12. Each number corresponds to a specific measurement, which you can see below:
- #1 - 1/8"
- #2 - 1/4"
- #3 - 3/8"
- #4 - 1/2"
- #5 - 5/8"
- #6 - 3/4"
- #7 - 7/8"
- #8 - 1"
These measurements determine the length that will be left after using the clippers. For example, a #1 guard won't cut any hair shorter than 1/8".
That said, specific clip guards will help you achieve particular haircuts.
Smaller guards are often used for cuts that require short hair, such as a buzz cut or fade. Meanwhile, larger guards can create a tapered cut or crew cut.
Styling Scissors
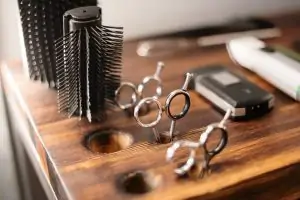
Hair clippers are designed to make even cuts, whereas scissors are for precise cuts and texture. They're typically used for areas with longer hair (at least longer than 1"), such as the top of your head.
Remember that we're not referring to kitchen scissors here. Hair-cutting scissors are lighter and sharper, giving you more precision when you cut your own hair.
Comb
You can't forget about the comb if you're doing your own haircut. This can help hold a section of your hair when cutting a specific area.
For example, you don't want to accidentally cut your top hair while trimming the sides.
Other Helpful Tools
The following tools are entirely optional but convenient to use.
If you're not planning to change your clothes, you can use a hair-cutting cape to keep them clean during your haircut.

Meanwhile, hair-cutting clips help hold multiple sections of your hair, especially if you have thick hair that one comb can't handle on its own.

3. Test Your Tools
If you're using a brand new hair clipper, it's essential to familiarize yourself before it touches your hair.
You can turn it on and off, change the speed settings, test it with and without a clipper guard, etc. If your model is cordless, you can check if it has enough power. We recommend reading the manual to know what you're working with.
If your clipper or other tools are pretty old, you can still test them to ensure they're in prime condition.
4. Set Up Your Workplace
If you're cutting hair at home, you should consider where you'll do it. Somewhere like your bedroom or kitchen isn't preferable because you're more likely to make a mess in these places.
We recommend going somewhere with a mirror, proper lighting, sink, a table/platform for your tools, and/or a disposal bin.
The bathroom works best in this scenario, but you can also use your backyard or garage.
Additionally, you'd want to use multiple mirrors to have a view from various angles. After all, it's pretty risky to cut where you can't see.
If you have a large mirror in your bathroom, you can take a handheld mirror and have them face each other at an angle to reflect the back of your head. A three-way mirror works just as well, which looks something like this:

Once you find the appropriate workplace, clean up the area and put all your tools within arms-length away from you.
The last thing you want is losing something among the mess and frantically running around your house halfway through a haircut.
5. Clean Your Hair
The last step to take is cleaning your hair just like how you usually do. Clean hair is easier to cut and won't clog your tools, unlike greasy and dirty hair.
You can then towel-dry or blow-dry your hair and comb it to eliminate tangles. After that, you're pretty much ready to cut your own hair.
How To Cut Your Own Hair In Different Ways
Now, let's move on to the actual process.
As a general tip, cutting longer than you think you need is often safer. You can always cut your hair short later, but you can't attach already cut hair.
The following steps will mainly focus on the common haircuts men get. You can always modify them when necessary.
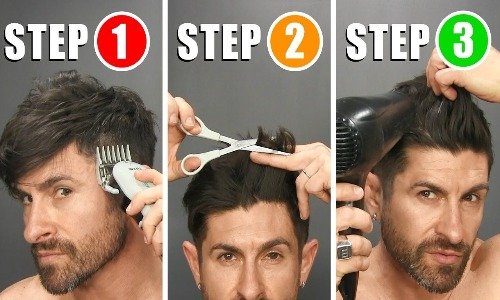
1. Trim The Sides
Haircuts usually start by trimming the side hair. Take your clippers and attach the guard of your choice, then comb your sides down. You can also comb the top hair forward or use a hair clip to move it out of the way.
Trim in the opposite direction of your hair growth, starting from the bottom and then moving upwards.
The height you cut your sides depends entirely on your style, but we don't recommend going too far up. You can make a few passes to ensure everything is the same length.
After you cut one side, do the other. It's best to regularly look at a mirror to see if both sides are symmetrical.
A popular haircut among guys is the fade. Once you finish cutting your sides, you can take a smaller clipper guard and cut the bottom portion. Your fade will look more professional if you use multiple guards to blend the layers of hair.
Afterward, it should look something like the image below. As you can see, the bottom portion is slightly shorter, creating a smooth fade transition on the sides.

2. Move On To The Back
Next, you'll need to trim along the back. Apart from having multiple mirrors, you must work slowly with a steady hand because this can be pretty tricky.
You can use the same techniques earlier to bridge the two sides of your head.
However, your hair will look like a helmet if you cut it straight along the back. Unless that's what you want, we recommend cutting in a downward curve for a more natural look. If you look at the image below, the sides go down to the center of the back.

However, you can skip this step if you're going for something like a mullet (see image below). In that case, we recommend cutting your sides until the back of your ear.

3. Cut The Top Short
The top is a significant part of any haircut because it determines the shape of your hairstyle and how it looks when styled.
If your haircut needs to be very short at the top, like a buzzcut, you can use your hair clippers to cut all the hair. You can use the same guard number you used for the sides or a slightly larger one to create a fade effect.

However, you need to do a scissor cut for longer haircuts at the top. We recommend wetting your hair first because the strands will stick together, making them easier to cut.
If you have wavy or curly hair, we advise you to cut it longer than you need because your hair will shrink and curl upon drying.
You can take your clips and separate the bulk of your hair if needed. Use your comb to pull up some of your hair, then use your index and middle fingers to hold it up.
You can move your fingers up or down to determine how much you want to cut. Then, take your scissors and cut off the hair above your fingers in a straight line. You can look at the image below if you need a visual example.

You'll now repeat this process for the rest of the hair. It's best to regularly compare new sections of your hair to the previous ones to ensure a uniform length.
If you skipped the second step in this list, you could trim your back hair with scissors. Once you're done, you can comb through your hair to see if anything sticks out.
4. Clean The Hairline

After cutting their own hair, men often forget to clean the hairline. This step is crucial if you use clippers because the edges are meant to look sharp and even.
You can take your clippers or beard trimmer and hold it upside-down like a pencil. You'll then go around the edges along the ear line, neck, and sideburns to ensure clean lines.
5. Finalize Your Haircut
The final step is to wash your hair to remove any cut hair on your scalp. After drying, you can have one last look to see if everything's good.
If there are any inconsistent cuts or you want a shorter haircut, feel free to repeat the steps in this guide.
Otherwise, you're pretty much done. Give yourself a pat on the back!
Dapper Point: What about trying out what you have learned by giving yourself the haircut styling you want the most? Read here and make your choice -- Blowout Haircut.
Watch This!
Frequently Asked Questions
Is it possible to cut your own hair?
Yes. Men can cut their own hair short, so long as they know what haircut to get and the proper tools to do it.
How do I cut wavy hair?
As mentioned, we recommend cutting longer than you think you need if you're working with wet hair. Wavy and curly hair will shrink and curl once dry. If you cut it as you would with straight hair, then it will end up shorter than expected.
What if I make a mistake while cutting my hair?
If you need to attend an important event on short notice, then we recommend going to your barber. Otherwise, remember that your hair can still grow back, and you can try again.
Making mistakes is expected when doing something for the first time. So long as you keep practicing, you'll get better at cutting your own hair eventually. Always remember to practice safe procedures to avoid mishaps like razor burns.
Conclusion
When cutting their own hair, men don't necessarily need outside help. This can be scary at first since your hair is a significant part of your appearance. However, becoming a self-barber comes with its benefits.
It can be pretty empowering to do things independently and learn a new skill along the way! You'll also save time and money in the long run.
That said, thank you for reading our guide on how to cut your own hair for men. We hope this information helped you be your own barber!